15 January 2017
Carputer Project—A How-To By Example
Preface: Back in 2007, during my second year of university, I installed an x86 computer running Windows XP in my car. I was recently cleaning up some old documents, and found a “how-to” guide I had written at the time. I seemingly never got around to publishing it. I never completed the guide, but I thought it’d be fun to release it in its preserved form now. To give some historical context, work on my “carputer” predated the first iPhone. The computing environment has changed alot since 2007. 10 years on, all of my carputer’s hardware could be replaced by a single tablet. I’ve also got a pretty extensive album of photos of working on the car. Oh the nostalgia. Without further ado, my 2007 guide to assembling a carputer.
Introduction
This document reports on the process I undertook in building, installing, configuring and utilising a personal computer in my car running a Windows based operating system. My personal carputer is still in its preliminary phases and I don’t believe there will ever come a time when I will consider it “finished” as such. Software will continue to evolve and I will be continuously improving and maintaining my personal carputer. As these changes take place and my knowledge grows, this document will be revised and newer versions will likely be released intermittently.
What’s a Carputer?
If you’re reading this, you may or may not be familiar with the term “carputer”. A carputer or “CarPC” refers to a personal computer system installed in an automobile. A carputer generally uses a computer monitor (alas somewhat smaller than that found on most desktops) hooked up to a computer system installed somewhere in the vehicle. Most carputer users run a Windows based operating system, although this cannot be stated exclusively. This allows the user to theoretically run any application or software in the car that would normally be run on a desktop computer, providing the hardware can support it. The applications of a carputer are somewhat limitless, some of which are described in this document.
Intended Audience
This document is targeted primarily at individuals interested in installing, configuring and operating a carputer. The content caters largely for beginners who have a general interest in computers although are unfamiliar with the peculiarities of carputers and the inherent dissimilarities to a regular home or office computing environment. The document has also been designed to keep advanced carputer users interested by branching off into technical topics throughout. Some of these technical topics can be found embedded in this document, some may be contained in other related documents and some may exist on the World Wide Web. My own carputer setup has been used as an example throughout this document to try and give readers an idea of what’s involved in a carputer setup and what can be achieved with a bit of research and creativity.
Document Organisation
I’ve tried to keep this document as straight forward and readable as possible. Links to other sections of this document and other resources are used at times to prevent information which diverges from clogging up the topic in discussion.
Why A Carputer?
The first question that usually comes to mind when a person is introduced to the concept of a carputer is “Why on earth would anybody want or need a computer in their car?” The simple answer to this question would be “Because they can.” This will generally be enough to get a change of topic out of someone who had already decided the concept is ridiculous before they asked the question. On the other hand, if the question was genuine and not rhetorical in nature, it may be worth justifying the decision with more than a three word answer.
Some of the common arguments you can expect a carputer user to present to justify the time and money they’ve spent on their in car creation are:
- Personal Jukebox—a user’s entire music catalogue can be stored on the computer’s hard-disk. No more swapping discs or wishing you’d remembered your favourite Nikki Webster album.
- Movies and Videos—not overly useful to the driver of a non-stationary vehicle, but does provide entertainment for passengers to make long trips a lot more enjoyable.
- Television—equipped with the right hardware and software, free-to-air television can be viewed on the carputer. Navigation – using a GPS receiver and the correct software, a carputer can be used as a GPS navigation device to direct the lost.
- Wireless internet—access to the internet anywhere and on the move. Check your email or surf the net whenever you like providing a connection is available. As tempting as it may be, it’s not advisable that you attempt to use this feature while driving, no matter how urgent it is you reply to your instant messages.
- Rear View Vision—by connecting a rear view camera to the rear of the vehicle the driver can see what’s immediately behind them when reversing.
- Wow factor—the response the owner gets from friends when they see the Frankenstein fusion of car and computer in all its glory.
Perhaps the biggest reason most people decide to install a carputer is integration. One of the key advantages of a carputer is that you can have all of these things, all in one place. A carputer is a multi-purpose device meaning it can replace a large number of specialised devices with a single solution.
More advanced users can and have used carputers to take in-vehicle integration to an entirely new level. This includes controlling electronic windows, climate control and many other OEM and aftermarket devices from the computer. Other advance uses include performing engine diagnostics and management and taking sensor readings (e.g. engine temperatures) to name just a few.
My personal rationale for installing a carputer has been a combination of both the rudimental functionality listed earlier and the advanced functionality available. The thing that has always struck me about a carputer over any off the shelf multimedia unit is the extensibility. The possible applications and customisation of a carputer stretch far beyond that of any off the shelf multimedia unit on the market. Taken from a developer’s perspective, this is great news.
This is perhaps the biggest reason of all that I personally chose to install a carputer. Being somebody who has been working in the IT industry and hopes to continue doing so, the concept of a carputer caught my eye as something of interest. I see it as an opportunity to develop my own applications and hardware to integrate into the system and continue to push the boundaries of what can be achieved using a carputer. In the process, I have learnt and will hopefully continue to learn a phenomenal amount of information; much of which is relevant to my chosen career path. I’ve found I learn most effectively when I can relate it back to something I’m interested in and passionate about, hence the carputer.
The Vehicle In Question
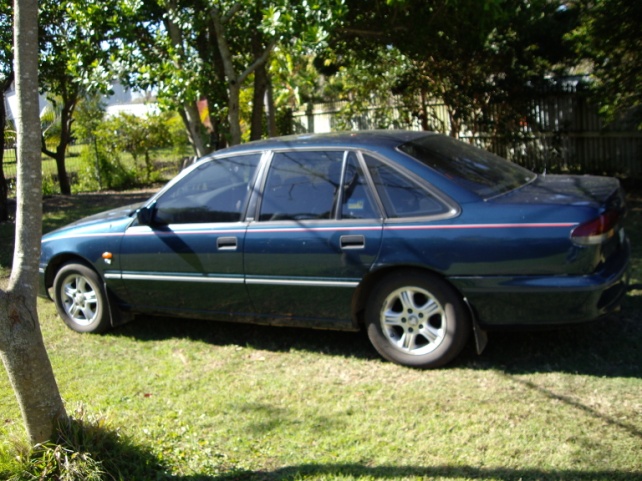
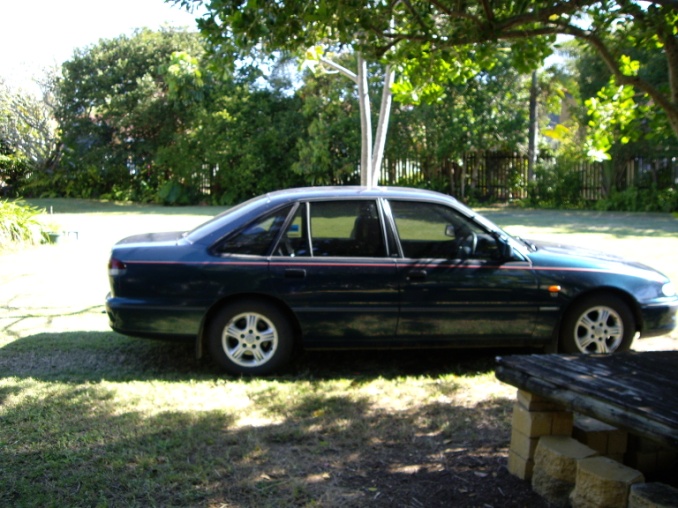
The vehicle my carputer is installed in is a 1997 Holden VS Commodore. There was no special reason I chose this vehicle, it’s simply the first and only car I’ve owned. As far as a carputer setup is concerned this vehicle is primarily limited in that it does not use OBD-II and integrating climate control features is a difficult task (which I haven’t done at this point) with what’s available.
However, this vehicle is gifted in that by the time I come to sell it chances are it will be worth next to nothing (2017: can confirm, sold for ~$400). This might not sound like a good thing, but I see it as meaning very little hesitation in chopping up the centre console and modifying the vehicle to suit my needs, considering this will not have any drastic effect on the vehicle’s resale value. This gives me the freedom to experiment and to a certain extent use this vehicle as a “rough draft”. It’s also a very common vehicle meaning that it’s generally not difficult to find spare parts in the event that something gets messed up in the installation process.
Hopefully at some point in the future when I purchase a new vehicle, I’ll know exactly what I would like as far as installation is concerned and do it right the first time. Taking my physical installation skills into consideration, this will most likely involve handing over the physical installation side of things to a trained professional. Software I can handle.
Hardware
This section of the document discusses the hardware I chose to build my carputer setup from. Included in this section is a summary of why I chose the components I did, as well as a listing of the cost of each component and where it was sourced from.
Monitor
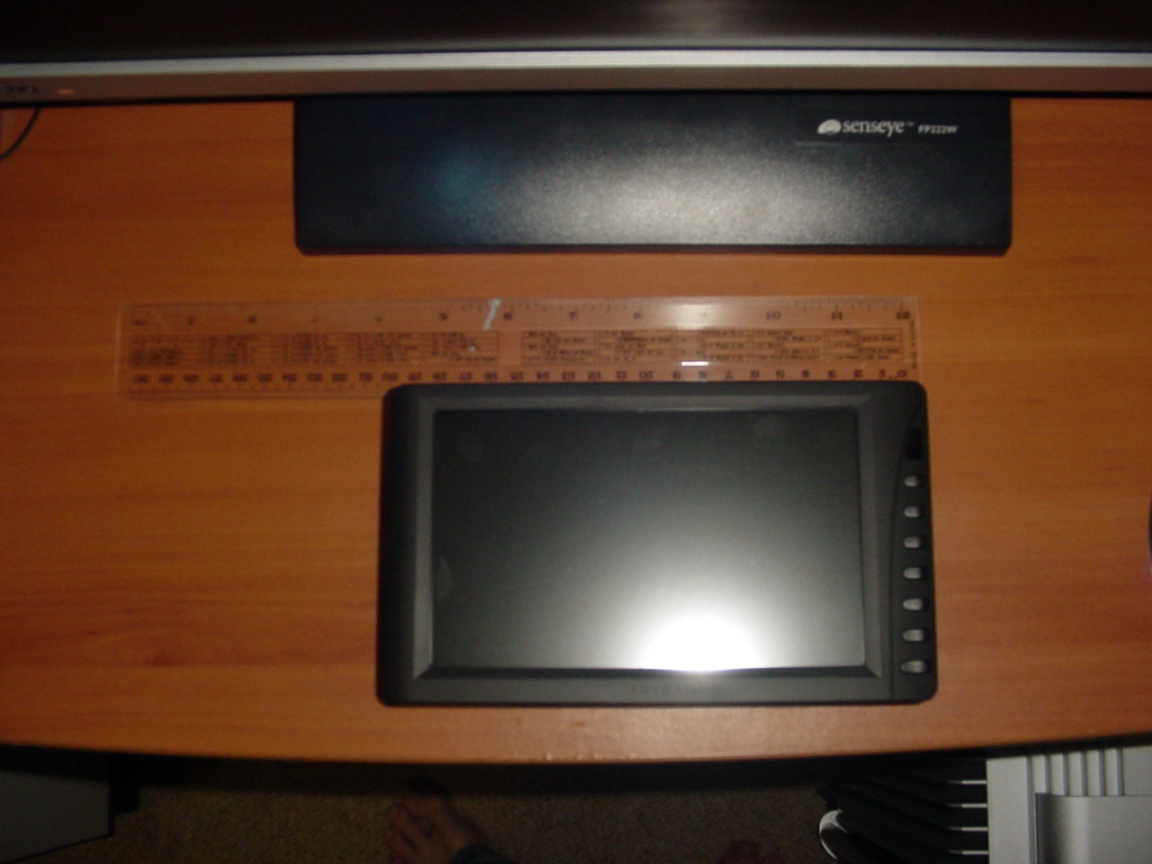
The monitor I used in my installation is a Lilliput 7” touch screen (Model #. EBY-701). I chose this monitor over any other monitor for the following reasons:
Touch Screen Functionality
From a usability perspective, most people consider touch screen functionality essential in a carputer setup. Almost all software that has been written for carputer applications has taken touch screen usage into consideration (large buttons, easy to navigate while driving etcetera). Using a keyboard and mouse while driving tends to be quite awkward regardless of where and how it is mounted. It also puts yourself and other road users at risk.
If you do not wish to use a touch screen however, another alternative is to use an input device such as the Griffin Powermate. This device is a programmable controller that allows you to perform various operations by turning a knob, pressing a button or using other actions similar in nature. When setup correctly, this will allow a user to perform operations such as adjusting the volume and changing tracks safely and easily without the need for a touch screen or keyboard. However for me personally, a touch screen was essential.
Size
Out of all the monitors I looked at, this one came closest to fitting the space I had available to me in my vehicle. At this point in time my installation skills are far from perfect, so as far as I’m concerned, the easier to install the better. Anybody considering buying this monitor, please note that the correct outer dimension are 197mm L x 117mm W x 33mm D at deepest. When researching this monitor I found that different sites stated different dimensions, none of which were correct. I ended up consulting somebody who already owned one and asked them to measure it for me, so the dimensions listed here are the true dimensions.
Brand Reputation
When looking for a carputer monitor, generally the first two brands that people suggest are either Lilliput or Xenarc. Historically Xenarc monitors have been considered to be of a higher build quality than that of Lilliput monitors. Many of the earlier Lilliput monitors were failure prone, although the general consensus is that the company has lifted their standards and is now producing more reliable monitors, the quality of which some have now dared to compare to Xenarc.
Price
While not cheap, Lilliput monitors are comparatively well priced when put up against brands such as Xenarc.
A note on monitors: One of the regular complaints from carputer users in regards to monitors in an automotive environment is the lack of sunlight readability. Sunlight can often make viewing the monitor a painful experience at certain times of the day and under certain conditions. To counteract this problem, some monitors can be purchased that use what is called a transflective display, which drastically improves sunlight readability. At present, these transflective displays are substantially more expensive than non-transflective displays.
A cheaper alternative to this that has been proven to yield impressive results is 3M’s Vikuiti range of products. These are specialised films designed to increase the brightness of a screen and reduce glare. These films can be purchased for a couple of dollars each and when installed correctly can yield results which come reasonably close to that of a transflective display. Using these films however requires that the user dismantle the LCD screen and also have some knowledge as to exactly which of the Vikuiti films are required and how to correctly install them.
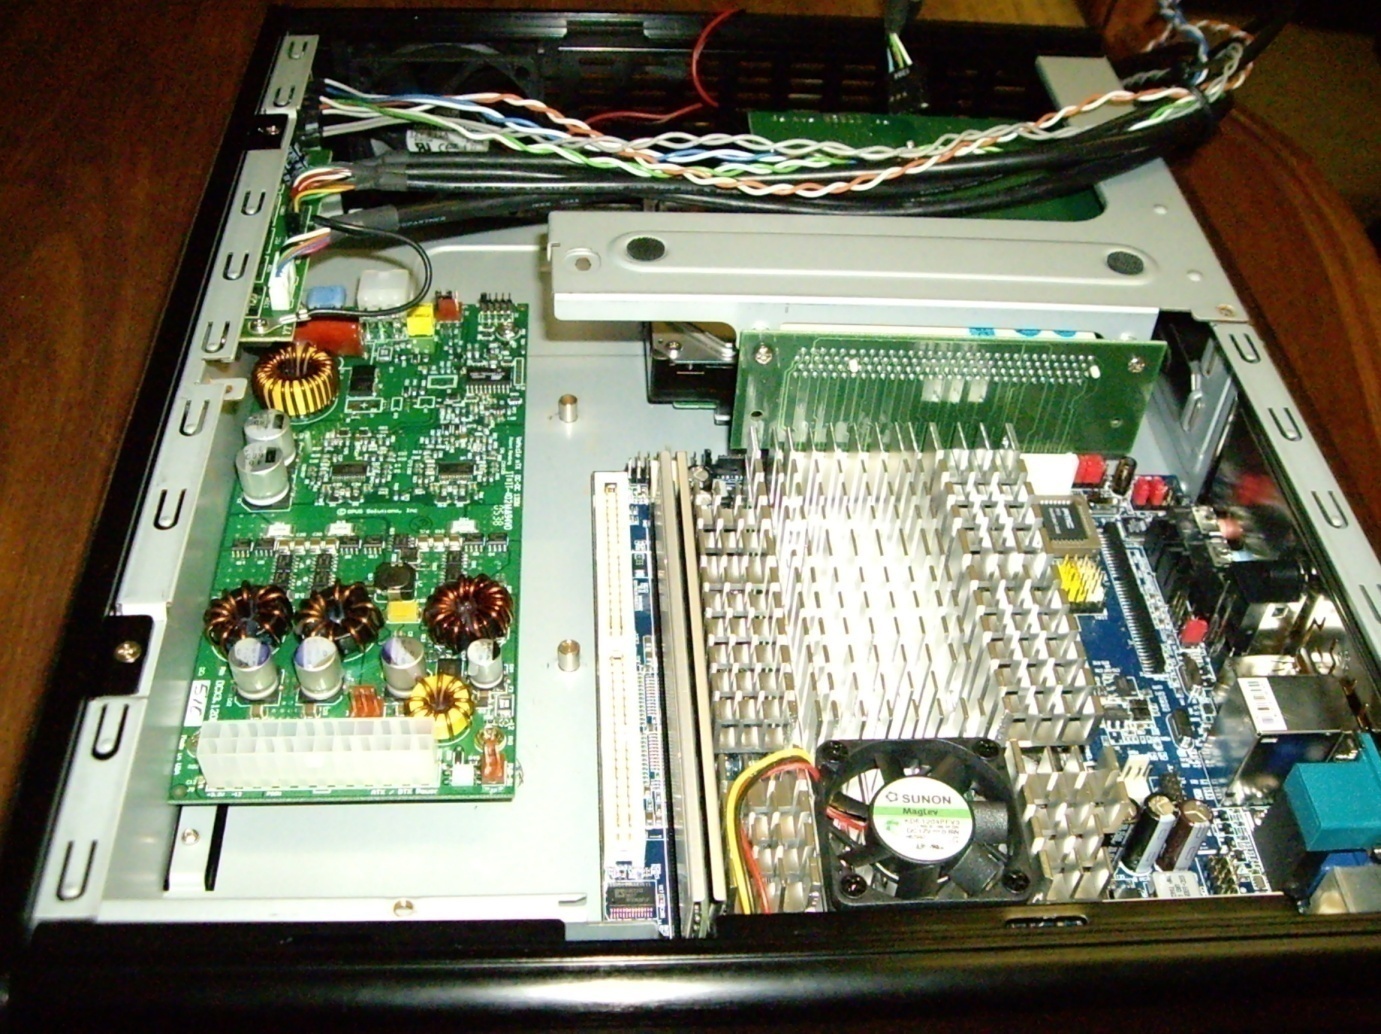
Motherboard
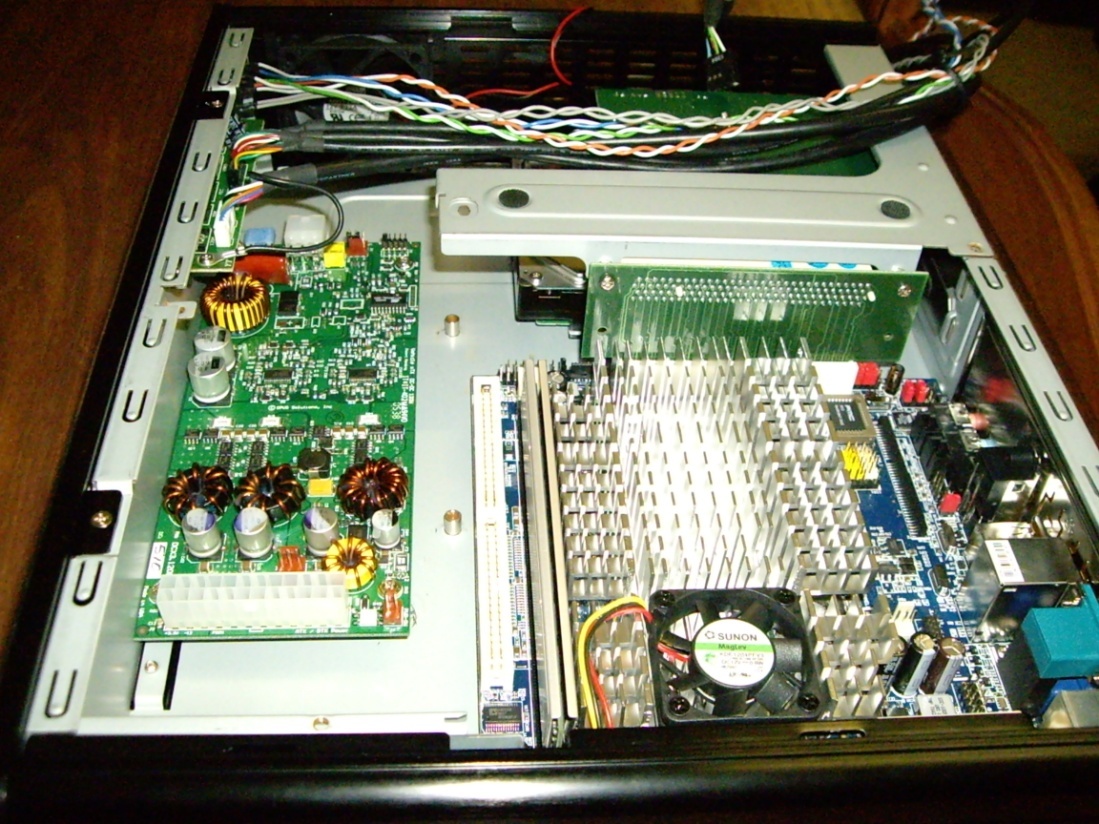
The motherboard I chose for my carputer is a VIA embedded (Model #. EN-15000G). This motherboard is a big step away from “cutting edge” as far as raw processing power is concerned; however it has many traits that make it ideal for a carputer setup. The reasons I chose this motherboard are:
Efficiency
A huge advantage of the embedded architecture of this board is the inherent efficiency. Even under heavy load, the power consumption of this motherboard will rarely exceed 20 watts, which includes providing power to the embedded or “onboard” CPU. To put this in perspective, a 1.5 GHz Intel Pentium 4 CPU consumes up to 62.9 watts of power alone.
In a home or office environment, higher power consuming computers are not so much a cause for concern. This is because high powered AC-DC power supplies designed to be used in a home or office environment are mass produced, meaning low cost. On the other hand, high powered DC-DC power supplies which are suited to an automotive environment serve only a small niche market, meaning they are not mass produced and cost a significant amount more per watt output.
Form Factor
The VIA EN-15000G motherboard conforms to the Mini-ITX form factor standards, making it a mere 17cm x 17cm. From an installation perspective, the compactness of the Mini-ITX form factor is very beneficial where room is limited in an automotive environment.
As is the case with a number of boards manufactured by VIA, the EN-15000G is based around an embedded architecture meaning that nearly everything is found onboard. This includes an embedded CPU, onboard graphics and onboard gigabit LAN etcetera. Having all these things onboard drastically simplifies the PC build process meaning less time expended on assembly of the machine.
Brand Reputation
I felt comfortable going with this motherboard after reading mostly good reports and reviews about VIA’s range of embedded motherboards.
Price
The VIA embedded motherboard costs less than what you would likely expect to pay in order to build a PC using a non-embedded processor and add on cards to cater for graphics and the likes.
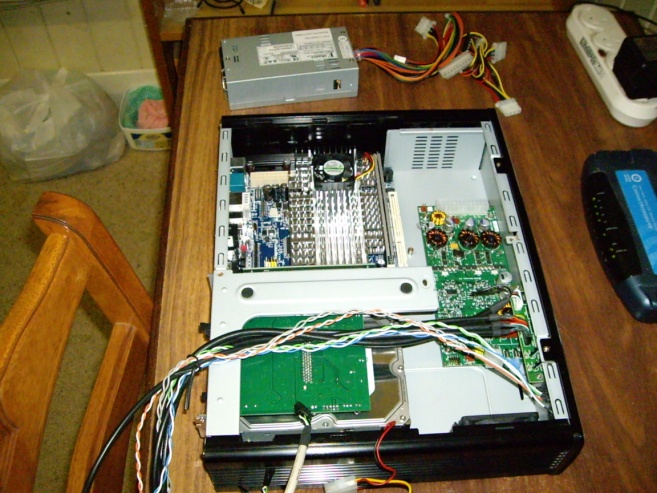
Power Supply

In a home or office environment the power source for the computer’s power supply is generally a power outlet at the wall. Depending on which country you live in, this power outlet typically has an output voltage of between 110-240 volts of Alternating Current (AC). Internally, a computer runs off of Direct Current (DC) as opposed to AC. What this means is that a normal household computer power supply has to convert the AC coming from the wall to DC which the computer’s components can happily accept. This is sometimes referred to as an AC-DC power supply.
Not only does it convert AC to DC, but it also steps down and regulates the voltage, such that the computer can operate safely. A computers internals require a range of different voltages (typically 12 Volt, 5 Volt and sometimes 3.3 Volt) to operate various components. If these voltages drop or rise too far above these nominal values a computer may cease to function correctly. This is why the power supply regulates these voltages to ensure they do not stray too far from the required levels.
In an automotive environment, the initial source of power (the car battery) is somewhat different. Unlike a power outlet in the home, a standard car battery generally outputs between 12-15 volts of DC. This means that unlike a conventional power supply that would be used in the home; the power does not have to be converted from AC to DC. Therefore a carputer uses a special kind of power supply called a DC-DC power supply. It’s important to note that a carputer cannot simply be hooked straight up to the car battery, as the power must still be stepped down to the required voltage levels and must still be regulated.
The power supply used in my carputer installation is an OPUS 120 watt DC-DC power supply. I chose this power supply for the following reasons:
DC-DC Topology
As has just been mentioned, a specialised power supply which accepts DC and also outputs DC is required for automotive applications. The OPUS power supply meets this criterion.
Built-in Startup and Shutdown Controllers
The OPUS power supply uses built in startup and shutdown controllers that allow the computer to start-up automatically when the vehicle’s accessories or ignition is turned on and shut-down automatically when the vehicle’s ignition is turned off. The OPUS power supply shutdown delay can also be configured via jumpers to wait 10 seconds, 10 minutes, 30 minutes or 60 minutes before shutting down the computer once the ignition is switched off.
Unaffected By Engine Cranking
Engine cranking is the initial point where you turn the key to start the ignition. During engine cranking the car battery voltage drops as the vehicle draws a large amount of current to start the vehicle. If you’ve ever used a head unit in your car before, you would have noticed that when you start the ignition the head unit cuts out for a few seconds. This allows the ignition to get the maximum amount of power possible out of the battery to start the vehicle.
Let’s say you’ve only had the car switched to accessories though and you’re using your carputer. As soon as you go to start the vehicle, you don’t want the power to the carputer to be cut directly. Not only would this constitute an unsafe shutdown, but it would also be an inconvenience. This is why it’s ideal to have a power supply that can survive engine cranking.
Size
Unlike some higher output DC-DC power supplies, the 120 watt OPUS takes up relatively little space. It has no outer metal casing or chassis making it even smaller. Being a low voltage DC-DC power supply it does not carry the high risk of electrocution that would be present if you attempted to run a household AC-DC power supply without using the protective chassis which it comes encased in.
Brand Reputation
At time of writing, OPUS is considered the industry leader in automotive carputer power supplies. OPUS power supplies tend to be more reliable and offer more features than a number of other competing products in the market.
Price
The brand reputation of OPUS power supplies tends to come at a price. However, I was lucky enough to pick up my OPUS power supply second hand at a small fraction of retail price.
Hard-Disk Drive
The hard-disk drive I chose for my carputer is a Seagate 320GB 7200RPM drive which uses a 16MB cache. The reasons I chose this drive over any other was:
Storage Capacity
As far as my storage requirements for a carputer are concerned, 320GB is more than enough. This was plenty of space for storing all the music I could ever want to listen to in the car, even with most of it being stored in a lossless format which tends to produce large files. As I don’t intend on watching a large number of movies in the car, I haven’t used up much space with video content. Even so, a 320GB hard-disk drive would allow hundreds of hours of video content to be stored in a compressed format with a picture quality that would more than exceed the picture quality that most carputer screens could produce. In other words, the screen is allot more likely to be the weakest link than the compressed video format when it comes to picture quality.
Most applications designed for carputers are lightweight and tend to take up minuscule amounts of disk space, so this was not a cause for concern when selecting a hard-disk drive.
Price
Over the years the price of storage space has dropped drastically. For my carputer purposes I consider 320GB to be overprovisioning and I could afford to do so due to the affordability of hard-disk space in this day and age.
Speed
7200RPM is now considered a relatively standard speed to expect to get out of a 3.5” hard-disk drive. While faster drives running at 10,000 or 15,000 RPM can be purchased, these cost significantly more per GB of space and also require more power to operate. 7200RPM can still be considered an improvement over a 5400RPM or slower 2.5” laptop hard-disk, which some people choose to use when space is at a premium.
Large Cache
Cache is simply an area of high-speed computer memory used for temporary storage of frequently used data. I chose to go with a hard-disk that uses a 16MB cache rather than an 8MB cache because the difference in cost between the two was negligible.
Brand Reputation
At the time of writing, Seagate is the biggest manufacturer of hard-disk drives on the planet. When you manufacture that many hard-disk drives, you’d assume they know what they’re doing.
SATA Connectivity
I basically had a choice of using a hard-disk drive with a SATA connection or using a hard-disk drive with an IDE connection. I chose SATA being as it is a newer style connection which operates a little faster than IDE. SATA also has the benefit of using a serial cable, meaning it is thinner making installation easier and improving airflow throughout the system.
A note on storage devices: Often when people plan out a carputer, they question whether or not a hard-disk drive should be used in an environment as rough as that of a travelling automobile. People tend to worry that hitting a pothole or going along a rough road will cause their hard-disk drive to die one way or another. For this reason, many people turn to using solid state storage devices as opposed to a hard-disk drive which has a number of moving parts.
When I researched this myself, I found allot of conjecture, but not much hard reliable scientific evidence to suggest either way that you should or shouldn’t use a hard-disk drive in an automotive environment. So I took a different approach and went by other people’s real life experiences with running a hard-disk in an automotive environment. I found that the majority hadn’t experienced any overly detrimental effects from using a hard-disk drive in a carputer, so I jumped on the bandwagon. Some did experience problems, but the majority didn’t, so I consider it a calculated risk.
Solid-state storage is significantly more expensive per GB than that of hard-disk storage and using it instead of a hard-disk tends to make the operating system and software installation process significantly more complex. With allot of meddling and tweaking, small improvements in boot times can be achieved using a solid state storage device. Personally I couldn’t justify all the trade-offs and extra complexity added to a system by using a solid state storage device, simply for peace of mind against a small possibility of hard-disk failure as a result of a rough environment. The data I store on my carputer is not of an overly important nature, meaning a hard-disk failure to me would constitute an inconvenience but not a catastrophe. After many months on the road, my hard-disk is yet to have missed a beat and I still personally consider it to be the easiest and most effective option for most people.
Memory
[Insert pictures here] (placeholders like these are still here from 10 years ago).
The memory I chose to use in my carputer is one stick of 512MB DIMM DDR2 RAM running at 533 MHz. My brand selection on this was rather arbitrary as I did not specifically aim to buy any brand-specific product. The reasons I did chose this RAM however are:
Size
For my carputer and the software it runs, 512MB is more than a sufficient amount of memory. When using system hibernation, having more RAM can actually be detrimental to your system’s boot time. This is because when a computer goes into hibernation, it dumps a copy of everything stored in RAM onto the hard-disk drive in a hibernation file. This includes that RAM space which may not even be in use at the time. When the PC boots up again, it copies the hibernation file’s contents back onto the RAM. The more information that has to be copied over, the more time it takes for the computer to resume from hibernation.
Speed
533 MHz is the fastest RAM that the VIA EN-15000G motherboard accepts. This is the only real reason I chose RAM which operates at this speed.
Compatibility
The VIA EN-15000G motherboard has a single DIMM Socket for RAM which accepts DDR2 RAM running at up to 533MHz. The RAM I chose met this requirement and is hence compatible with the VIA EN-15000G motherboard.
PCI-PCMCIA Adapter
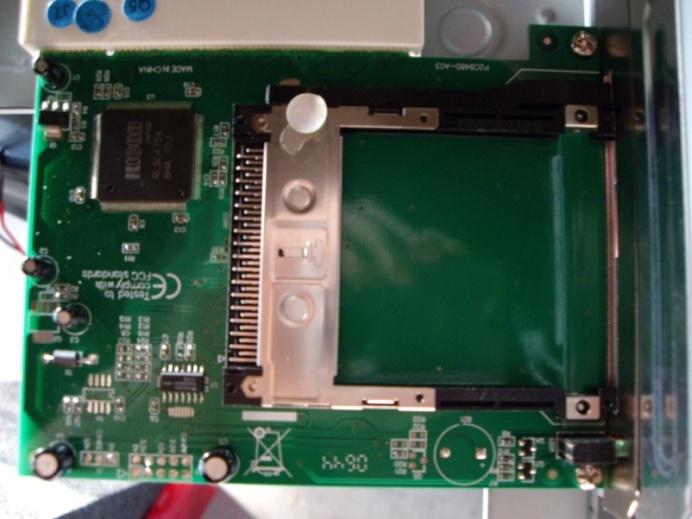
The VIA EN-15000G motherboard is equipped with only a single PCI slot. As the carputer system I’ve built uses onboard video and is not equipped with an internal soundcard, I had the PCI slot free for a PCI-PC Card adapter. I use this adapter so that I can slot in a wireless network card to have my carputer run on my home network without any physical cables being run. There are only two reasons I chose this specific PCI-PCMCIA adapter over any other:
Type II PCMCIA Compatibility
The physical form-factor or shape of card that the adapter accepts is that of a PC Card. However, the PC Card form-factor has a number of internal implementations. This means that simply because a PCMCIA card fits in a PC Card socket, does not mean it will necessarily work. An example of this is many Dell laptops, which come equipped with a PC Card slot, but do not recognise Type II PCMCIA Cards.
Price
It was one of the cheapest adapters I found that met my requirements.
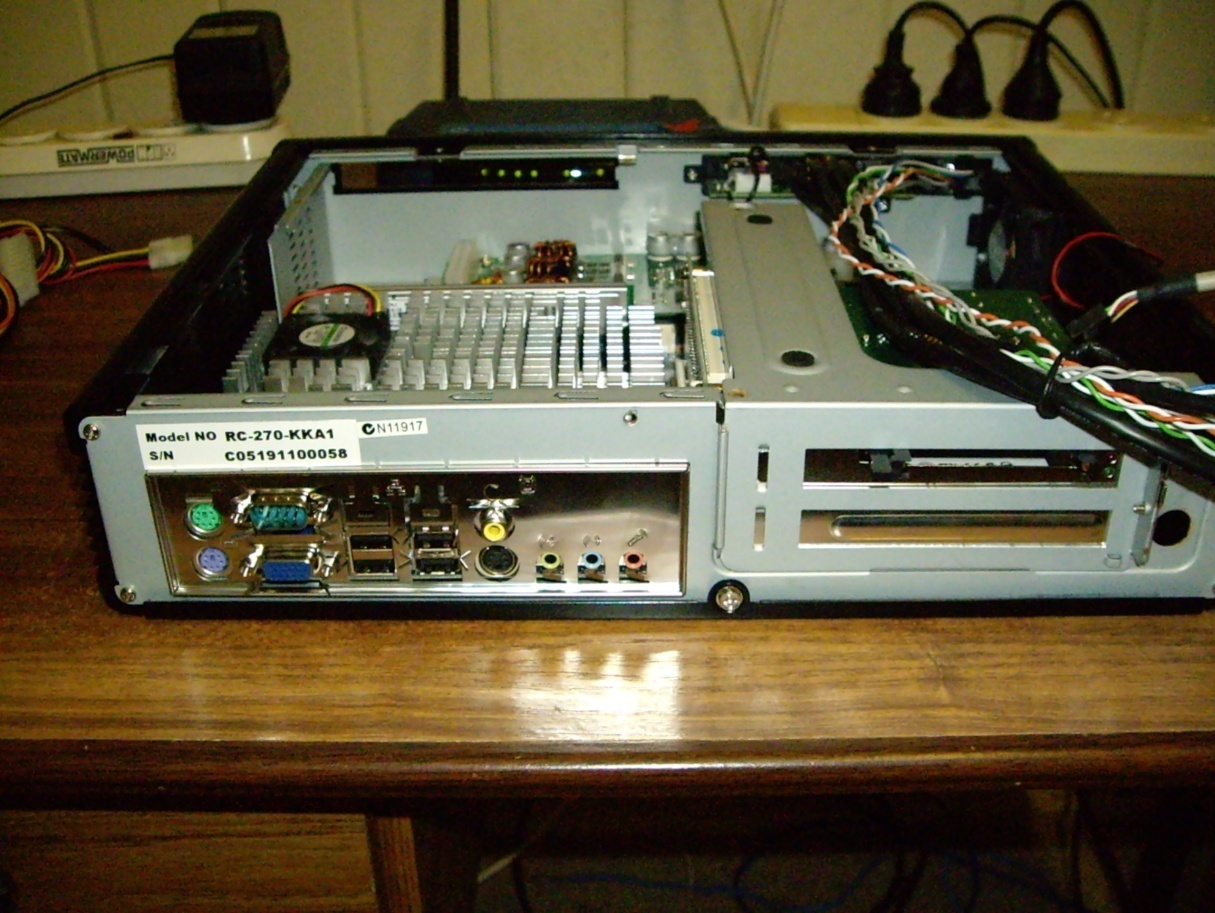
Case

The case I’ve used in my carputer installation is a CoolerMaster CM Media 270. Here’s why I chose this case:
Form Factor
The CoolerMaster CM Media 270 case has been designed to accept a Mini-ITX form factor motherboard. This is the form factor of the VIA EN-15000G motherboard that I have used in my installation.
Size
This case is rather compact, especially its height. The physical installation of my carputer required a case which was low profile such that it could be tucked away under a false floor in the boot of my car.
Bundled Power Supply
The power supplies that come bundled with computer cases tend not to be of very high quality, especially on cheaper cases. However, the AC-DC household 220 watt power supply that came bundled with this case did the job for the purpose of installing the operating system and testing the computer away from the car. It’s always best to get the carputer up and running on a test bench before taking the plunge and wiring it up to a DC-DC power supply in the car. This way you don’t have to worry about running the car battery flat while you get the software up and running. It also means you can use a full sized monitor to install the software and not be stuck sitting in an awkward position looking over at a small screen inside your vehicle.
A note on cases: Not everybody decides to use a computer case in a carputer setup. Many people simply install and mount the various components in a way that fits the room available. I chose to use a case for my installation, simply because a case is already predrilled and designed to fit all the components of a running computer without much hassle.
Optical Drive
[Insert pictures here]
Being as the heart of my carputer is hidden away in the boot of my vehicle under a false floor, there was not much point in getting an optical drive which would be mounted in the computer case itself. Instead, I chose to get an external USB optical drive. I chose this drive because:
USB Powered
This particular optical drive gets all the power it needs to operate directly through the USB connection. This means that the optical drive can run correctly without having to be plugged into any other power source other than the USB cable which connects it to the computer.
Size
The optical drive is of the slimline variety, meaning it takes up very little space. I may one day mount the optical drive somewhere in the car although for the time being it spends its life in the glove box.
CD/DVD reading and writing capabilities
Something that I found allot of slimline drives did not have was the ability to not only read CDs and DVDs but also to write to them. This means that if I wanted to I could burn CDs and DVDs on the run.
Slot loaded
This particular optical drive is slot loaded, meaning that instead of having to eject a disc tray to insert a disc, you simply slide the disc into the slot. In the given environment I personally think this is a neat feature, and will also make for a neater more coherent installation (if I ever get around to installing it).
Mount Anywhere
The optical drive I chose is designed in such a manner that it can be mounted pretty much anywhere in any position. This includes both vertical mounting, horizontal mounting and any other permutation or combination of the two. It can even be mounted upside down if absolutely necessary (try doing that with a tray loaded optical drive).
Keyboard and Mouse
[Insert pictures here]
Even with a touch screen, it’s still handy to have a keyboard and mouse around. Rather than getting a separate keyboard and mouse, I ended up buying a combination device which consists of a wireless keyboard and touchpad combo made by Adesso (Model #. WKB-4000US). I chose this keyboard because it had these features:
Wireless Connectivity
This keyboard runs communicates wirelessly with a USB receiver, meaning no cords draped everywhere while trying to use it and also very portable. I can stash it away anywhere in the vehicle (usually the glove box) without having to worry about unplugging and plugging in cords.
Compact Design
In a car there’s generally not much room to be typing or using a mouse in. There’s also no flat surface like a desk that you can plonk a keyboard and mouse onto, so having something compact that can sit on your lap is a definite advantage.
Single Device
Something I liked about this device is that it incorporates both a keyboard and mouse in a single device. Once again, this is beneficial from a usability perspective in a cramped environment.
Network Interface Card
[Insert pictures here]
The Network Interface Card or simply NIC that I selected for my carputer setup is an Orinoco Gold 802.11b wireless PC Card. I purchased this card based on:
Product Reputation
The Orinoco Gold cards were released onto the market several years ago now, however are still considered to be one of “THE” cards to own for wardriving. When I finally found one for sale at a ‘reasonable’ price, it was difficult to refuse.
Compatibility
Orinoco Gold cards utilise a PRISM chipset which is known for its compatibility with a vast array of wardriving and wireless networking tools. Cards which use the PRISM chipset are often preferred for specialist applications such as packet capture also.
Wi-Fi Antenna
[Insert pictures here]
The antenna I currently use with my carputer is a generic omnidirectional 7dBi antenna. Omnidirectional means that signal strength is distributed evenly in all directions as opposed to a unidirectional antenna which focuses its signal in a specific arc. 7dBi specifies the gain of the antenna which plays a large role in determining signal strength and the distance at which signals can be picked up. This antenna came bundled with the Orinoco Gold NIC and does a reasonable job of picking up signals so I am yet to change it. I may one day upgrade to a higher gain antenna and perhaps even a signal amplifier if I ever decide to take wardriving more seriously.
GPS Receiver
[Insert pictures here] Navigation was one of the key things I wanted out of a carputer, so a GPS receiver was essential. Used with the correct navigation software, a GPS receiver allows a carputer user to have onscreen navigation with turn by turn directions; the same functionality you would expect out of a dedicated GPS navigation device. The GPS Receiver I chose to use with my carputer is a [insert type of receiver and model number here]. I chose this receiver for the following features:
SiRF Star III Chipset
The SiRF Star III is the latest GPS chipset manufactured by SiRF Technology. This chipset has a faster Time to First Fix (TTFF) than other chipsets meaning that the vehicle’s position can be acquired quickly after the GPS receiver is activated. This chipset is also known to do a better job of maintaining signal locks in urban and densely covered areas where other chipsets tend to lose signal locks more easily.
Waterproof
This model of GPS receiver has been designed to be waterproof. Currently this is of no great benefit as I have had the GPS receiver mounted on the dash inside my vehicle. However, I may one day relocate the receiver to outside the vehicle. This will ensure maximum signal strength and the most accurate satellite tracking.
Size
This model GPS receiver is one of the smallest USB GPS receivers I could find allowing for easy installation.
Soundcard
[Insert pictures here]
The soundcard I chose for my carputer installation is a Creative Audigy 2NX USB Soundcard. I chose this soundcard because it possessed the following qualities:
USB Connectivity
As I used the only available PCI slot on the VIA EN-15000G motherboard for a PCI-PCMCIA adapter, an internal PCI soundcard was out of the question as I wasn’t willing to sacrifice my Orinoco Gold PC Card for the sake of the soundcard.
External
When selecting a soundcard, I actually preferred to get an external card rather than an internal card that would get fitted in the motherboard’s PCI slot. Internal soundcards are susceptible to induced noise from other electronic components operating in the near vicinity. How much of an affect this has on sound-quality is debatable, but every bit counts and I prefer prevention over cure.
Bit Rate/Sampling Rate
The SoundBlaster Audigy 2NX plays music at up to a 24-bit bit rate and up to a 96 kHz sampling rate. In very simple terms, if two soundcards were identical in every aspect except for the bit rate and sampling rate, the card with the higher bit rate and sampling rate would be able to produce music more accurately. 24-bit/96 kHz is considered to be a relatively high bit/sampling rate and is more than adequate for my purposes.
Optical Output
The stereo setup and configuration I decided on integrating with my carputer required optical output from the soundcard. The SoundBlaster Audigy 2 NX met this requirement.
Brand Reputation
Creative is the largest producer of computer soundcards on the planet, so hopefully they’re getting something right. All the reports I heard about this soundcard were relatively positive, so I was felt assured in my purchase.
USB Hub
[Insert picture here]
Because my carputer setup runs a large number of USB devices I required a USB hub to extend the number of USB ports available to me. I initially purchased a 4-port USB hub, but found that this was not enough, even with another 3 USB ports available on the motherboard. The USB hub I am currently using is a Connectland 7 port USB 2.0 compatible hub. I chose this hub based on:
Number of ports
As stated above, my initial 4-port hub simply didn’t cut it with the number of USB devices I’m running. After purchasing the 7-port hub, it’s not looking like I’ll need any more USB ports anytime soon.
USB 2.0 Compatibility
The hub I chose, like most USB devices on the market at present, is fully compatible with the USB 2.0 standard. This means a theoretical maximum aggregate throughput of 480Mbps on the hub as opposed to USB 1.1 standard’s 12Mbps theoretical maximum throughput. Aggregate throughput means that the speed is split between each USB port on the hub. A hub by nature is not an overly smart device and is only able to divvy up the connection speed across ports evenly. This means that the total available bandwidth (in this case 480Mbps) is divided evenly across all 7 ports. No one port is able to “borrow” unused bandwidth from another port to in order to operate faster. Even with the bandwidth divided in this manner, each port still has a throughput over and above what is required to run most USB devices effectively, and more importantly those used with my carputer.
Externally Powered
The Connectland hub I chose is externally powered, meaning that it requires a dedicated connection to a regulated 5 volt power source. The USB 2.0 standard allows for a maximum 500mW power draw from a USB port itself. When a hub is thrown into the equation, this 500mW gets split across all ports on the hub. This begins to cause problems when you have a large number of devices on the hub which require more than a miniscule amount of power each. To conquer this problem, many hubs are externally powered, meaning they draw their power from a separate 5 volt line and not the USB port that it plugs into. This allows for enough power draw to provide all USB ports on the hub with the full 500mW of power they may require.
USB Extension Cables
[Insert Pictures here]
Most of the USB devices used in my carputer setup are located at the front of the vehicle. As a result, I needed to purchase two USB extension cables. I used one of these two extension cables to connect up to my Connectland USB hub which is installed at the front of the vehicle behind the monitor. The second USB extension cable is dedicated to the touch screen monitor. I found that the touch screen functionality of the monitor did not work correctly when plugged into a USB hub. This is why I ran a second USB extension cable dedicated to the touch screen monitor, which fixed the issues I was having.
The USB extension cables that I chose are no-name generic 5 metre cables. I found the first sort of cables I purchased had very poor compatibility and in most instances did not work at all. I then purchased some different generic no-name USB extension cables which have worked perfectly. So really it has been a case of luck of the draw – I found that one type of cable didn’t work so tried another. The things I looked for in a USB extension cable were:
USB 2.0 Compatibility
Not all USB extension cables meet the USB 2.0 standards. These cables did.
Inline Repeater
As a signal propagates through a cable it attenuates over distance. The further the signal must travel, the higher the attenuation will be. A number of other factors other than distance affect the level of attenuation per unit length of cable, although these are not discussed here. High attenuation will generally result in a very slow connection; lack of reliability and in some cases a cable which simply doesn’t work. This doesn’t just apply to USB cables. A repeater is a device that regenerates the signal it receives, meaning any attenuation which has occurred in the cable before the repeater is negated. One the repeater has regenerated the signal, it is sent out the other end of the repeater like new again. Having inline repeaters is very helpful when long runs of cable are used which would otherwise be unable to transmit a signal reliably due to high levels of attenuation. The USB extension cables I’m using do use a repeater (the repeater will usually be a little box with a small circuit board inside which sits at some point between the two ends of the cable).
The USB specification states a maximum cable length of 5 metres without a signal repeater for USB cables that use 20 gauge wiring with a resistance of 0.036 ohms/metre. This is the thickest wiring/lowest resistance combination covered under the USB specification. Other maximum length specifications do exist for USB cables which use thinner wire and have higher resistance, although none of these exceed 5 metres. As the USB extension cables I am using are 5 metres in length, they are bordering on the maximum allowable distance for reliable transmission of data under the USB specification. To err on the side of caution, I chose to purchase extension cables which use an inline signal repeater.
A note on USB signal repeaters: USB hubs also repeat or regenerate input signals before sending the signal out the other end. This means hubs may also be used as a mechanism to extend the usable length of USB devices if necessary.
VGA extension cable
[Insert Pictures here]
Because the motherboard for my carputer is installed in the boot and my monitor is installed in the dash, the monitor’s VGA connection cord did not reach. The solution to this was to simply purchase a 10 metre VGA extension lead. While a 5 metre lead would have been more than sufficient, I was able to purchase a 10 metre lead for only a few dollars more. There was no special reason that I selected this extension cord over any other – it simply suited the task and was the first one I found available.